2016-tfg-Ignacio-Malo
Planning and executing movement on robotic arm.
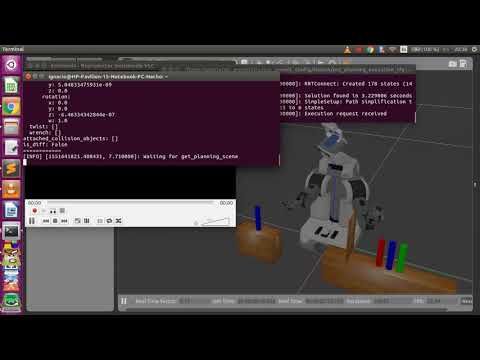
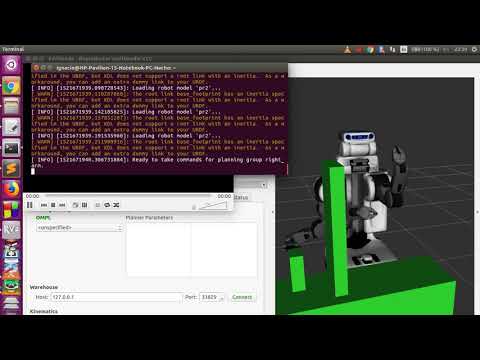
Final solution videos

Add kinematics, create new world, simulate real time in the video
Add top limit to gazebo, and refine plannings
Modify movements
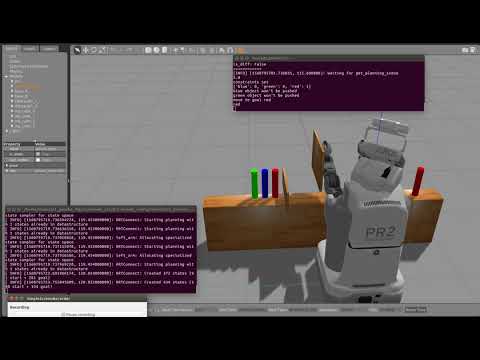
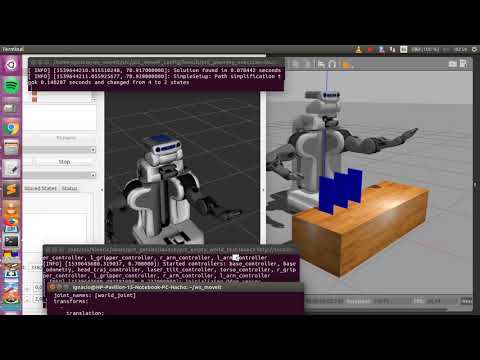
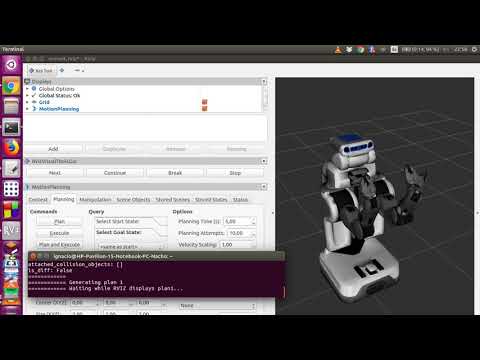
After lots of tests, the following scenario is solved by moveit without retracting the arm in the majority of cases(flying objects are only in PR2 mind, but not in the real world).
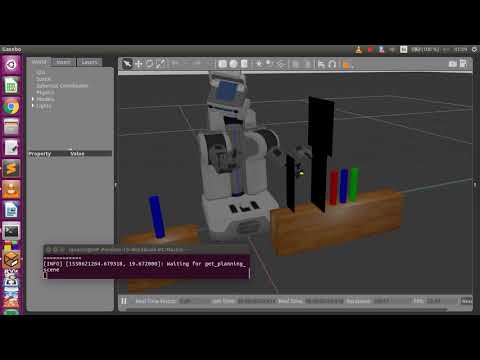
Move head + main obstacle + first prototype
Move head has been added at start. After several tests to make movements showing object avoidance in theatrical way adn refactoring part of the code, the result is here.
Facing some problems with Head movements
Trying to planning to the desired goal using head, I am facing some problems. I have worked with quaternions in order to plan using information from roll, pitch, yaw. The following error appears.
[ INFO] [1551045832.519652451, 985.653000000]: Ready to take commands for planning group head. [ 0.1205903 0.37940946 -0.04995013 0.91597567] position:

 x: -0.01707
 y: 0.0
 z: 0.38145
orientation:

 x: 0.120590303922
 y: 0.379409457403
 z: -0.0499501278329
 w: 0.915975669416
[ WARN] [1551045832.784618817, 985.692000000]: Fail: ABORTED: Catastrophic failure [ INFO] [1551046183.362015324, 1037.969000000]: ParallelPlan::solve(): Solution found by one or more threads in 0.080588 seconds [ INFO] [1551046183.362552930, 1037.969000000]: RRTConnect: Starting planning with 1 states already in datastructure [ INFO] [1551046183.363281516, 1037.969000000]: RRTConnect: Starting planning with 1 states already in datastructure [ INFO] [1551046183.379158187, 1037.969000000]: RRTConnect: Created 5 states (2 start + 3 goal) [ INFO] [1551046183.383185065, 1037.969000000]: RRTConnect: Created 5 states (2 start + 3 goal) [ INFO] [1551046183.386655888, 1037.969000000]: ParallelPlan::solve(): Solution found by one or more threads in 0.024388 seconds [ INFO] [1551046183.525537440, 1037.983000000]: SimpleSetup: Path simplification took 0.138544 seconds and changed from 4 to 2 states [ WARN] [1551046221.273289008, 1042.021000000]: Controller head_traj_controller failed with error code GOAL_TOLERANCE_VIOLATED [ WARN] [1551046221.273466699, 1042.021000000]: Controller handle head_traj_controller reports status ABORTED
Could be related to collisions between the robot itself. Requires some additional research.
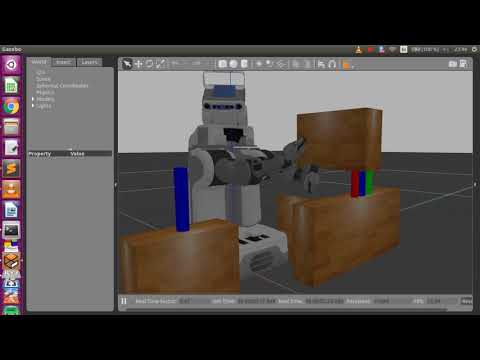
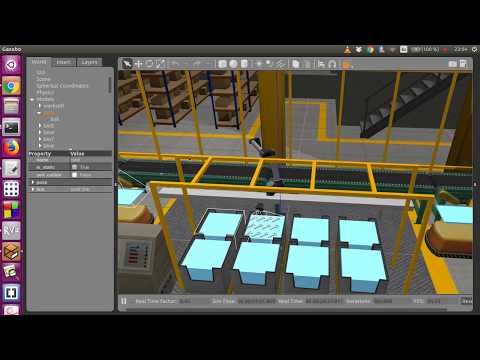
Detect colors and push objects: First prototype
After some work to integrate image functionalities with planning and trajectory execution, there is a main node which uses pyhton language to complete the first approach to the final goal. Code refactoring is required but the first trailer is already available.
USING PR2 KINECT CAMERA TO DETECT COLORS AND OBJECTS
After inspecting pr2 definition(pr2.urdf.xacro) I have found that Kinect camera could be added in the PR2 head if we pass a parameter when launching PR2 in gazebo. By modifying the topics from our image manipulation node, we can handle images from that kinect camera.
KINECT2=true roslaunch pr2_gazebo ims_tfg.launch
There is one problem: PR2 laser is generating red noise in front of the robot, so pr2.urdf.xacro has been modified to disable it. New functionality has been added to the image manipulation node. findContours function allows to detect shapes(objects), and we are able to discard those caused by noise by calculating the area.
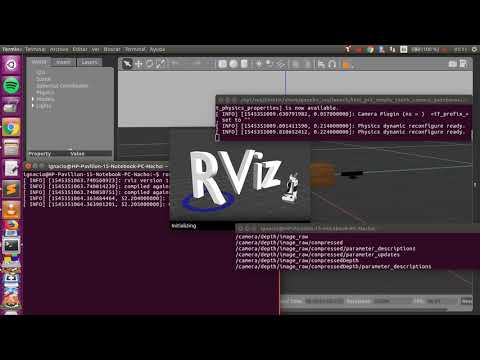
KINECT, ROSTOPICS & PYTHON NODE
The next step is to consider using rostopics to get images from gazebo in kinect camera. It has been necessary to modify the kinect gazebo model in order to generate the same topics as real kinect cameras. It’s possible with libgazebo_ros_openni_kinect plugin which allows to set different image parameters and topics. After inserting the model in our test world, we can see images using rostopics from two alternative tools. The main node should be launched first:
1) rosrun image_view image_view image:=/camera/depth/image_raw
2) rosrun rviz rviz
Now I’m facing two issues. The main one is the flickering in images, which may be caused by sending depth and rgb information to the same topic somewhere. It would explain the following error from a listener node in phyton, using opencv libraries:
"Received an image! [32FC1] is not a color format. but [bgr8] is. The conversion does not make sense"
GAZEBO: ADD CAMERA(FLYING KINECT)
The next goal is to apply a color filter to images from the simulator. It will allow to detect an object, and after that calculate its position. I’m going to advance step by step. The first one is to create a gazebo world with some objects(different colours). Adding a flying kinect camera in the right place and orientation, in addition to navigatorCamera (https://jderobot.org/Tutorials#Simulated_FlyingKinect_.2B_NavigatorCamera_.2B_RGBDViewer) enables to see the objects. Now I’m trying to fuse this functionality with color filter.
JDEROBOT: COLOR FILTER
In order to choose any object in the first area we’ll need the color_filter JdeRobot component. After some problems due to outdated packages, I made some tests modifying MyAlgorithm.py and I’m able to filter the red ball in the exercise(http://jderobot.org/JdeRobot-Academy#Color_filter).
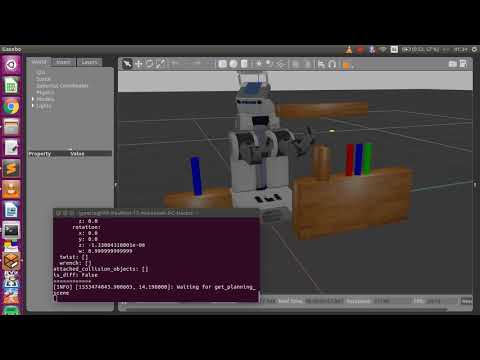
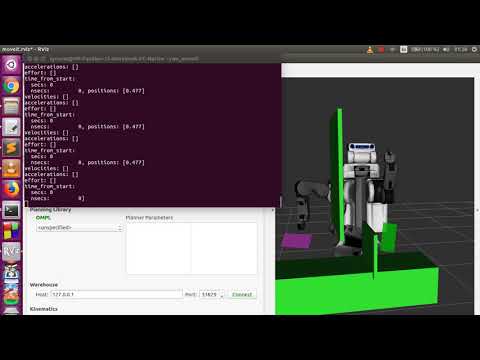
MOVEIT-GAZEBO: LINKED MOVEMENTS
Going back to the move group pyhton interface. The final goal is to plan movements from one area with some objects(bowling) to another area. Objects will be coloured different and a color filter will choose the object to touch and will go to a hardcoded destination crossing some obstacles.
The first step to reach the objective is to resume the planning interface and plan some linked movements. After playing with different scenarios, we get a more complex result using a world in gazebo with three blue objects. It’s possible to move to one of them and push
MOVEIT-GAZEBO: PICK&PLACE FIRST APPROACH II
This week a lot of researching issues were necessary. It has allowed to solve the first problem(INVALID_JOINTS) by adjusting some config and yaml files. After that, new error was found:
[ WARN] [1527628608.416898346, 100.140000000]: Controller r_arm_controller failed with error code GOAL_TOLERANCE_VIOLATED

[ WARN] [1527628608.417181161, 100.140000000]: Controller handle r_arm_controller reports status ABORTED
Seems to be fixed after adding a new parameter in controllers.yaml (goal_time). But we still get the “Attached body ‘my_cube_3’ not found” and execution is stopped. After some debugging tasks, executing movements from Rviz to detect something that isn’t propagated to Gazebo, I’ve found some troubles with right gripper movements:
[ERROR] [1527721184.398834852, 51.080000000]: Controller is taking too long to execute trajectory (the expected upper bound for the trajectory execution was 1.508298 seconds). Stopping trajectory.

[ INFO] [1527721184.398929472, 51.080000000]: Cancelling execution for r_gripper_controller

[ INFO] [1527721184.428941849, 51.081000000]: Execution completed: TIMED_OUT

[ INFO] [1527721184.432500199, 51.081000000]: ABORTED: Timeout reached
It match the place where pick&place stops, so I think that solving this gripper issue should be the next step.
Keep going…
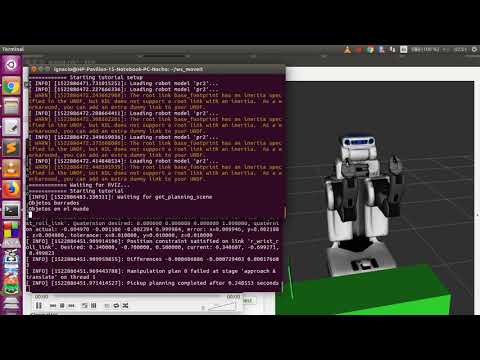
MOVEIT-GAZEBO: PICK&PLACE FIRST APPROACH
I After solving problems with controllers I’ve been trying to move the arm with pick&place script in both moveit and gazebo. First of all I’ve created a new world for gazebo with the same objects in the simple pick place script(no obstacles). The movement is planned and started. Nevertheless, I’m encountering some problems before the pick action, when the following logs appear:
Info: RRTConnect: Starting planning with 1 states already in datastructure

Info: RRTConnect: Created 5 states (2 start + 3 goal)

Info: Solution found in 0.061979 seconds

Info: SimpleSetup: Path simplification took 0.334853 seconds and changed from 4 to 2 states

[ INFO] [1527114465.471203162, 132.003000000]: Found successful manipulation plan!

[ INFO] [1527114465.472375654, 132.003000000]: Pickup planning completed after 0.806988 seconds

[ WARN] [1527114513.870427239, 135.584000000]: Controller r_arm_controller failed with error code INVALID_JOINTS

[ WARN] [1527114513.870615191, 135.584000000]: Controller handle r_arm_controller reports status FAILED

[ INFO] [1527114514.118595486, 135.605000000]: Planning attempt 1 of at most 1

[ERROR] [1527114514.119192057, 135.605000000]: Attached body 'my_cube_3' not found
I will review all references to joints in code and configuration files to check if I can manage with this issue.
PR2 CONTROLLERS: MOVEIT-GAZEBO INTEGRATION
Next step is about trying to define controllers for PR2 robot that allow us to move the arm in Gazebo simulation. I’m working on it using some help from github(PR2 moveit config) and YouTube(trying to follow this now). Other sources contain several changes in comparison to this tutorial.. Will have to test which combination is the right one. https://github.com/ros-planning/moveit_pr2/tree/kinetic-devel/pr2_moveit_config/launch https://youtu.be/j6bBxfD_bYs
PICK OBJECT WITH PR2 IN PYTHON
After countless issues and some sleepless nights I have started seeing some visual progress. Now I can plan a pick movement using python PickPlaceInterface. Retry policy should be implemented and after completing the place part we will check if the object is moved. But here we can see PR2 in action:
BACK TO PR2: MOVEIT BINDINGS FOR PYTHON
We are facing some problems trying to use moveIt in python because most of tutorials are developed in c++ and contain additional capabilities in comparison with python ones. After some research, I discovered some bindings that allow us to adapt c++ tutorial to pyhton(https://github.com/mikeferguson/moveit_python). New interfaces provided in this repository have been very useful to develop something similar to move_group_interface_tutorial (http://docs.ros.org/kinetic/api/moveit_tutorials/html/doc/pr2_tutorials/planning/src/doc/move_group_interface_tutorial.html).
 Now trying to adapt pick&place tutorial. There isn’t any description in ros website in this case so the main goal is to analize the code an reach the behaviour in c++ tutorial.
 Working on it.
MOVEIT MOVE_GROUP_INTERFACE_TUTORIAL FOR UR10
Some problems with the first approach with move_group_interface_tutorial and rViz have been solved. It can be moved from python, but it’s a bit uncontrolled yet. Can’t get joint values: “============ Joint values: []
 Traceback (most recent call last):
 File "/opt/ros/kinetic/share/moveit_tutorials/doc/pr2_tutorials/planning/scripts/movegroup_test.py", line 239, in <module>
   movegroup_test()
 File "/opt/ros/kinetic/share/moveit_tutorials/doc/pr2_tutorials/planning/scripts/movegroup_test.py", line 175, in movegroup_test
   group_variable_values[0] = 1.0
 IndexError: list assignment index out of range"
Code lines causing this problem have been commented by now. I can see obstacles from Rviz with UR10. I think we could avoid obstacles planning from the graphical interface.
I have tried to follow the collisions tutorial because it could be useful (http://docs.ros.org/kinetic/api/moveit_tutorials/html/doc/collision_contact_tutorial.html). The following error appears: ERROR: cannot launch node of type [moveit_tutorials/collision_contact_tutorial]: can’t locate node [collision_contact_tutorial] in package [moveit_tutorials]
MOVEIT: UR10 WITH RVIZ & PYTHON
After facing problems with UR10 in RViz, I found some additional packages that don’t seem to be installed by default but some sources (http://wiki.ros.org/ur10_moveit_config) recommended to install. After that, and updating the moveitTutorials repository with the last changes (https://github.com/ros-planning/moveit_tutorials/pull/148) related to ur10 and python tutorials. SOlved the problem with missing interactive markers in Rviz. Learn how to configure objects in rViz. It seems possible to avoid collisions from the graphical interface… code? First try to extrapolate python tutorial with PR2 to the one with UR10 has failed.
MOVEIT: PR2 TUTORIAL WITH RVIZ & PYTHON
Same problems identified with Rviz and the UR10 are repeated here with pr2(Rviz isn’t showing the interactive marker that allows users to choose the final position). So, using the graphical interface, we can’t choose the desired trajectory. Nevertheless I have finished with the python tutorial and pr2 arm is moved following the different instructions in move_group_python_interface_tutorial.py.
MOVEIT: First approach
I have started following tutorials in http://wiki.ros.org/ariac/Tutorials/MoveItInterface . I’m facing some problems in 5.1. Rviz isn’t showing the interactive marker that allows users to choose the final position. It could be similar to https://answers.ros.org/question/57611/moveit-rviz-plugin-no-interactive-markers-visibleavailable/ but I don’t know if this solution(modifying the URDF) makes sense in this case because the ur10_moveit_config is installed by default and it’s not something trivial. Right now, it’s possible to plan some movements from Rviz, but they are random. Arm is moved in ARIAC world in gazebo. Now: trying to make work the http://docs.ros.org/kinetic/api/moveit_tutorials/html/doc/pr2_tutorials/planning/scripts/doc/move_group_python_interface_tutorial.html . This tutorial allows to control the arm from python. But it’s prepared for a different arm.. so first try has been a failure. Maybe I could try with the original arm in order to make progress
ARIAC
After facing lots of problems with installation and configuration processes, ARIAC can be run using ROS KINETIC + GAZEBO 7 in Ubuntu 16.04. To achieve this goal, I have used the following tutorials: - http://wiki.ros.org/ariac/Tutorials/SystemSetup - http://wiki.ros.org/ariac/Tutorials/GEARInterface
Now it’s possible to launch the world in gazebo with a UR10 arm. Command from tutorial has been modified because ‘catkin find’ way doesn’t work as expected. It could have been caused by building the ARIAC packages from source instead of binaries.
rosrun osrf_gear gear.py --development-mode -f /home/ignacio/ariac_ws/install/share/osrf_gear/config/sample.yaml
After sending the first order in a different terminal, some objets move along the conveyor belt.
rosservice call /ariac/start_competition
Arm can be handled from command line by setting one or more movements for the UR10. In order to complete this action, we are going to use rostopics.
rostopic pub /ariac/arm/command trajectory_msgs/JointTrajectory "{joint_names: \
['elbow_joint', 'linear_arm_actuator_joint', 'shoulder_lift_joint', 'shoulder_pan_joint', 'wrist_1_joint', 'wrist_2_joint', 'wrist_3_joint'], points: \
[{time_from_start: {secs: 1}, positions: [1.85, 0.35, -0.38, 2.76, 3.67, -1.51, 0.00]} ]}" -1
Then RQT can be invoked from command line in order to move the arm.
rqt
Now, we can get the same result with code from Álvaro Villamil TFG. Launching the following command, arm can be moved in any direction:
~/2016-tfg-Alvaro-Villamil/ControladorBrazo/arm_viewer$ python main.py
First contact with MoveIt!
After some months trying to understand ROS in depth in order to reach the objective about moving the arm(PR2 in this case), we face problem trying to complete the following moveIt tutorials: a.- MoveIt! RViz Plugin Tutorial b.- Move Group Interface Tutorial c.- Move Group Python Interface Tutorial
It seems that Agile Robotics for Industrial Automation Competition (ARIAC), which goal is to test the agility of industrial robot systems could make this process easier. The main advantage is that previous acquired knowledge about Rviz, moveIt etc. will be also necessary to follow this way.
First Steps
In order to be able to develop a new project with JdeRobot, I started by installing JdeRobot5 in my Ubuntu 14.04.4 LTS. I did it following the instructions in Manual JdeRobot, specifically the “Installation for developing in JdeRobot”, from Debian packages. Once I finished the installation, I had to try some examples to check everything had been correct. To run any JdeRobot component, yo have to use the following syntax:
jderobotComponent --Ice.Config=jderobotComponent.cfg
“Example 2.1:Cameraserver+Cameraview” requires only this syntax, adapted to the components Cameraserver and CameraView, which must be run in this order. Then I tried “Example 4.1:Simulated Kobuki + KobukiViewer” and “Example 5.1:Simulated ArDrone + UAVViewer”. They require similar instructions. First, we have to launch Gazebo, then run the pertinent Jderobot component(you should do that from the component location). Example 4.1:Simulated Kobuki + KobukiViewer syntax:
gazebo ../gazebo/worlds/turtlebot.world     */ This world wasn´t created by default, but it will be in the next software update
cd JdeRobot/src/stable/components/kobukiViewer/
kobukiViewer --Ice.Config=kobukiViewer.cfg
Example 5.1:Simulated ArDrone + UAVViewer syntax:
gazebo /usr/local/share/jderobot/gazebo/worlds/ArDrone.world
cd JdeRobot/src/stable/components/uav_viewer
uav_viewer --Ice.Config=uav_viewer_simulated.cfg
Following these simple instructions it should work, but if you have some trouble with Gazebo, you may have to add this line before running Gazebo:
source /usr/local/share/jderobot/gazebo/gazebo-setup.sh
The last trick and some other problems, were solved in the mailing list, aimed to solve all kinds of problems that rise up when working with JdeRobot. The next archive is greatly useful Jderobot Developer List
The next step was to draw something using PyQt. I downloaded PyQt4 from PyQt Download, and checked some tutorials to start with something simple: The PyQt4 “Hello World”.