Gazebo and others
- Upgrading to Ubuntu 16.04, JdeRobot 5.4 and Python 3.5
I upgraded Ubuntu 14.04 LTS to Ubuntu 16.04 LTS. For this I followed the steps:
- First we need the machine is completely updated:
sudo apt-get update
sudo apt-get dist-upgrade
- When you’ll have all libraries and packages a day, wel have to upgrade to version 16.04:
sudo update-manager -d
We have already upgraded to Ubuntu 16.04.Now we can install JdeRobot 5.4.1. I’ve followed the steps on this page.
I had to install Gazebo7 using:
sudo apt-get install Gazebo 7
I had a problem with 50unattended-upgrades.ucf-dist file, and I’ve had to delete it. Then I’ve had to update:
sudo rm /etc/apt/apt.conf.d/50unattended-upgrades.ucf-dist
sudo apt-get update
- Inserting object in Gazebo
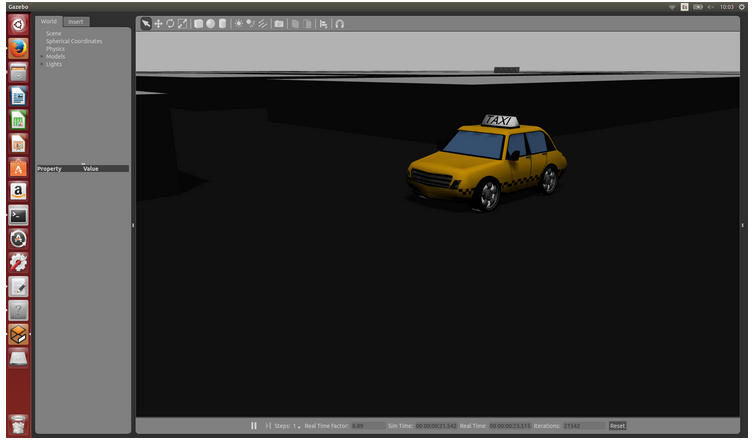
I have used the code of global_navigation practice to introduce new objects in the world of this practice. In this practice we have a yellowTaxi model. We can see a picture of the world with the taxi below:
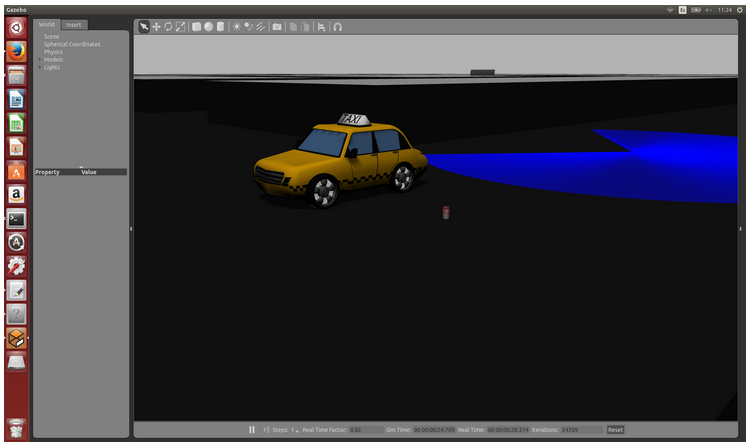
In the repository, I´ve changed the cityMedium.world and cityLarge.world files. I added coke_can and Hokuyo models in the world of Gazebo. To do this in the code of the two .world files, I added the following code behind the model sun:
        true
        model://coke_can
        4.5 0 0.75 0 0 0

            2 2 0.01


        model://hokuyo
        3 14 0.9 0 0 0

            20 20 0.4
New objects included in the Gazebo world, we can see in the picture below:
- Gazebo 7
Gazebo is a simulator that lets you create different stage of 3D simulation (both environments outdoors and indoors) for one or more robots providing a graphical interface for simulations and allowing reading and data entry robots that are simulating, and it can be modified all parameters in simulation time. An important feature of Gazebo is its realistic physics simulation of rigid objects, that is robots can interact with the world (can slide down, fly in the case of drones, can catch and push objects) and vice versa (are affected by gravity, and can collide with objects). Gazebo contains several plugins to add sensors to model of robots and simulate it, as odometry sensors, power, contact, lasers and stereo cameras. The connections between the different devices is done through IP addresses assigning a port to each, thus signals can be sent individually to each robot. This allows our programs are written in any language that supports TCP / IP.
Internally, Gazebo uses:
-
Open Dynamics Engine (ODE): is a free industrial quality library for the dynamic simulation of rigid solids, for example: vehicles, articulated creatures and moving objects in virtual reality environments. It is fast, flexible, robust and platform independent, with advanced joints, contact with friction and collision detection. ODE is designed to make interactive simulations in real time, besides having its own system of collision detection, the user can make changes within it even when running the application and also define your own collision system, customizing their functions according to use this you want to give.
-
OGRE: rendering engine of 3D graphic scenes.
To use Gazebo two files written in C are used, one configuration (.cfg) where the particular configuration of the set robots to simulate is detailed, layout and parameters of your sensors and a file where the map information is stored for simulation (.world).
Gazebo 7 is the latest version of Gazebo. Gazebo 7 has new features:
-
Undo button
-
Friendly Graphical Model Editor: Instead of trying to get your robot model into Gazebo by typing in numbers and stuff into an XML file, you can now use a graphical system instead.
-
Updated Simulator: Gazebo 7 includes torsional friction and wide-angle camera sensors, for when you need to accurately model the friction of rotating wide-angle cameras.
-
Tutorials: Improved tutorials and documentation, something very important for an Open Source project.
-
Long Term Support: Gazebo is switching to a yearly release model (instead of every six months). Odd numbered releases get 5 years of support, while even numbered releases get 2.
-
ArduPilot Gazebo Plugin
-
Performance improvements and bug fixes
-
Simulation models made by other models.
Install Gazebo using Ubuntu packages:
There are several ways to install Gazebo:
- Default installation: one-liner’
- Install:
curl -ssL http://get.gazebosim.org | sh
- To run Gazebo put the following command:
gazebo
- Alternative installation: step-by-step
- Setup your computer to accept software from packages.osrfoundation.org:
sudo sh -c 'echo "deb http://packages.osrfoundation.org/gazebo/ubuntu-stable `lsb_release -cs` main" > /etc/apt/sources.list.d/gazebo-stable.list'
If you want you can check if the file is written correctly. For example, in Ubuntu Trusty, you can write:
$ cat /etc/apt/sources.list.d/gazebo-stable.list
deb http://packages.osrfoundation.org/gazebo/ubuntu-stable trusty main
- Setup keys:
wget http://packages.osrfoundation.org/gazebo.key -O - | sudo apt-key add -
- Installation of Gazebo:
First you need to update the debian database:
sudo apt-get update
If you want to make sure that the process apt-get update completes without any errors, the console output ends in something like Done, as follows:
$ sudo apt-get update
...
Hit http://ppa.launchpad.net trusty/main Translation-en
Ign http://us.archive.ubuntu.com trusty/main Translation-en_US
Ign http://us.archive.ubuntu.com trusty/multiverse Translation-en_US
Ign http://us.archive.ubuntu.com trusty/restricted Translation-en_US
Ign http://us.archive.ubuntu.com trusty/universe Translation-en_US
Reading package lists... Done
Then install Gazebo 7 putting on the terminal:
sudo apt-get install gazebo7
# For developers that work on top of Gazebo, one extra package
sudo apt-get install libgazebo7-dev
The following error may appear:
$ sudo apt-get install gazebo7
Reading package lists... Done
Building dependency tree
Reading state information... Done
E: Unable to locate package gazebo7
This may be because the version of Gazebo you are looking for is not compatible with the version of the operating system you are using.
- To verify the installation you can run gazebo. The first time you run Gazebo requires some models are downloaded and could take some time. To run gazebo use the following command:
gazebo
Running Gazebo with a robot
For example if we want to simulate a world with a pioneer2dx,we have to write in a terminal the following command:
gazebo worlds/pioneer2dx.world
The worlds/pioneer2dx.world command finds the pioneer2dx.world file, and load it on start.
If you have Gazebo 7.0 installed on Ubuntu, in a terminal you can type the following to see a complete list of the worlds:
ls /usr/share/gazebo-7/worlds
Creating a model using the Model Editor
If you have already installed Gazebo and you have set up, then you can go to the Edit Menu and there click on Model Editor. The editor is composed of 2 areas:
-
The Palette on the left has two tabs.The Insert tab lets you insert parts (links and other models) into the scene to build the model. The Model tab displays a list of all the parts that make up the model you are building.
-
The 3D View on the right where you can see a preview of your model and interact with it to edit its properties and create joints between links.
The GUI tools on the top toolbar can be used to manipulate joints and links in the 3D View.
If you want to add simple shapes, you need to know that the Editor Model has three simple primitive geometries that can be inserted into the 3D view to make a link model. In the palette, you can click on the box, sphere, cylinder or icon as simple shapes. You can move your mouse cursor over the 3D view to see the visual appear, and click/release anywhere to add it to the model. If you want to cancel the shape you added, then press Esc.
If you want you can also add custom meshes. To do this, first you have to click on the Add button under Custom Shapes, which pops up a dialog that lets you find the mesh you want to add. After, click on Browse button and use the file browser to find the mesh file on your local machine. If you know the path of the mesh file, you can enter it directly in the text field box next to the Browse button. Gazebo currently only supports importing COLLADA (dae, which is a file format used to exchange 3D digital asset exchange between various graphics programs), STereoLithography (stl, which is a computer file format computer-aided design, which defines geometry of 3D objects, excluding information such as color, texture or physical properties that do include other CAD formats), and Scalable Vector Graphics (svg, which they are a specification to describe two-dimensional vector graphics, both static and animated, in XML format) files. Finally, you have to click Import to load the mesh file. Then, add it to the 3D view.
You can also create joints, for this:
-
First, click on the joint icon on the tool bar. This brings up the Joint Creation Dialog which allows you to specify different properties of the joint you want to create. The default joint type is a Revolute joint.
-
Move your mouse over the link you wish to create a joint for to see it being highlighted and click on it. This link will be the parent link of the joint.
-
Move your mouse to the link which you would like to be the child link of the joint. Click on it to see a colored line connecting the two links and a joint visual attached to the child link. The line representing the joint is color-coded. The joint visual consists of RGB axes which help to give an idea of the coordinate frame of the joint. The yellow arrow indicates the primary axis of the joint.
-
If you have already detailed all the desired properties of the joint in the Joint Creation Dialog, click on the Create button at the bottom to finalize joint creation.
When you edit your model, you have to keep in mind that all measurements are in meters, also that Gazebo 6 supports editing links, visuals, and collisions, while in later versions it is possible to edit the sensors and plugins. To edit a link’s properties: Double-click on the link or right click and select Open Link Inspector. A dialog window will appear which contains Link, Visual, and Collision property tabs. Once you are done, click on OK to close the inspector.
It´s posible to edit joint propierties, which you would find in the joint SDF. To edit a joint: Double-click on the line connecting the links or right click on it and select Open Joint Inspector. The joint inspector will appear.
Once you have created your model, go to the Model tab in the left panel and give it a name. To save the model, choose File, then Save As in the top menu. A dialog will come up where you can choose the location for your model.When you’re done creating the model and you’ve saved it, go to File and then Exit Model Editor.